
When winterS chill wraps the world in frosty quiet, kitchens come alive with the warm scent of ginger and spice, heralding the holiday season. Among the treasured traditions, crafting gingerbread snowflakes stands out-a delicate dance of flour, ginger, and sugar transformed into edible winter wonderlands. The secret to turning these festive treats from simple cookies into glittering masterpieces lies in the flawless art of royal icing. In this article, we’ll unfold the techniques behind creating that perfect, smooth icing that hardens just right, enabling you to decorate intricate snowflake patterns with confidence and flair. Whether you’re a seasoned baker or a holiday enthusiast eager to try something new, discover how to bring frosty elegance to your gingerbread creations, one piped swirl at a time.
Crafting gingerbread snowflakes with perfect royal icing is a delightful journey that combines the warmth of holiday traditions with the artistry of baking. Achieving crisp, delicate edges on your gingerbread and mastering the ideal royal icing consistency transforms ordinary cookies into shimmering, intricate snowflake masterpieces that brighten any festive table or gift box.
Prep and Cook Time
- Planning: 30 minutes
- Chilling Dough: 1 hour
- Baking: 12-15 minutes
- Decorating: 1-2 hours (including drying time)
Yield
This recipe yields approximately 24 medium-sized gingerbread snowflakes,perfect for gifting or decorating your holiday home.
Difficulty Level
Intermediate: Ideal for those cozy with rolled dough and piping techniques but welcoming for adventurous beginners ready to learn.
Ingredients
- For the Gingerbread Dough:
- 3 cups all-purpose flour, sifted
- 1 tsp baking soda
- 2 tsp ground ginger
- 1 tsp ground cinnamon
- ½ tsp ground cloves
- ¼ tsp freshly ground nutmeg
- ½ tsp salt
- ¾ cup unsalted butter, softened
- ½ cup packed dark brown sugar
- 1 large egg
- ⅓ cup unsulfured molasses
- For the Royal Icing:
- 3 large egg whites or 5 tbsp pasteurized meringue powder + ¼ cup warm water
- 4 cups powdered sugar, sifted
- ½ tsp lemon juice or vanilla extract (optional, for flavor)
Instructions
- Prepare the Gingerbread Dough: In a large bowl, whisk together flour, baking soda, ginger, cinnamon, cloves, nutmeg, and salt.Set aside.
- Cream Butter and Sugar: Using a stand mixer or hand mixer, beat the butter and brown sugar on medium speed until light and fluffy, about 4 minutes.
- Add Egg and Molasses: Beat in the egg until combined, then slowly mix in the molasses for rich depth and moisture.
- Combine Dry and Wet: Gradually mix the dry ingredients into the wet batter until dough forms. If too sticky, add a tablespoon of flour at a time.
- Chill the Dough: Shape the dough into a disc, wrap tightly in plastic wrap, and refrigerate for at least 1 hour. This step ensures cleaner, crisper edges when rolling and cutting.
- Roll and Cut: Preheat oven to 350°F (175°C). Lightly flour your surface and roll dough to ¼-inch thickness. Use a snowflake-shaped cookie cutter with sharp edges for precise shapes.
- Bake: Place cookies on parchment-lined trays. Bake 12-15 minutes until edges are just firm and slightly darker-avoid overbaking to keep crispness without brittleness.
- Cool Entirely: Transfer cookies to wire racks instantly. Let cool thoroughly before decorating to prevent royal icing from melting.
- Prepare royal Icing: Whisk egg whites (or meringue powder and water) on medium speed until frothy. Gradually add powdered sugar and continue beating until glossy and stiff peaks form. Add lemon juice or vanilla if desired.
- Test Consistency: For intricate piping, thin the icing slightly with water to a “flood” consistency for filling, and keep some thicker for outlining and delicate details.
- Piping Techniques: Use a small round piping tip (#1 or #2) and a steady hand. Outline each snowflake first with thicker icing, then flood inside with thinner icing. Allow the outline to crust slightly before filling.
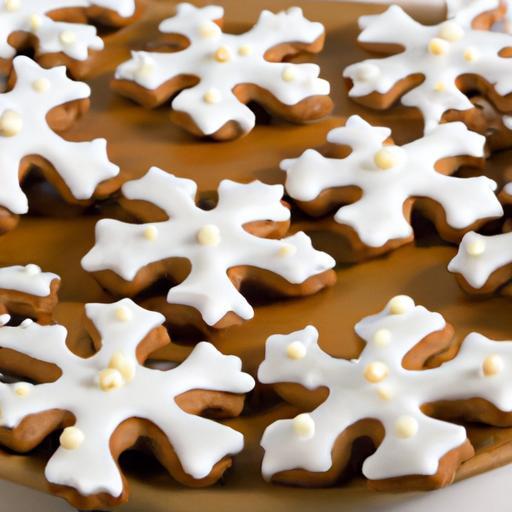
- Add Delicate Details: With thick royal icing, pipe fine branches and dots for classic snowflake motifs. Use quick, confident motions for clean edges and crisp points.
- Dry and Store: Let decorated cookies dry uncovered overnight in a cool, dry place. Store in an airtight container layered with parchment paper to protect the delicate decorations.
Chef’s Notes: Tips for success
- Dough Firmness: If the dough softens too much while rolling, chill again briefly to preserve snowflake edges.
- Royal Icing Variations: Adjust icing consistency by adding water dropwise. For ultra-fine details, stiffer icing works best; for filling, thin it just enough to flow smoothly.
- Coloring: Use natural gel food coloring sparingly if you want pastel-tinted snowflakes without losing royal icing’s firmness.
- Make-Ahead: Dough can be refrigerated up to 3 days or frozen up to 1 month. Likewise, royal icing keeps in a sealed container in the fridge for up to 5 days-re-whip before use.
- Troubleshooting: If your royal icing cracks when drying, it might be too thick-try thinning next batch. If it runs off edges, it’s too thin.
Serving Suggestions
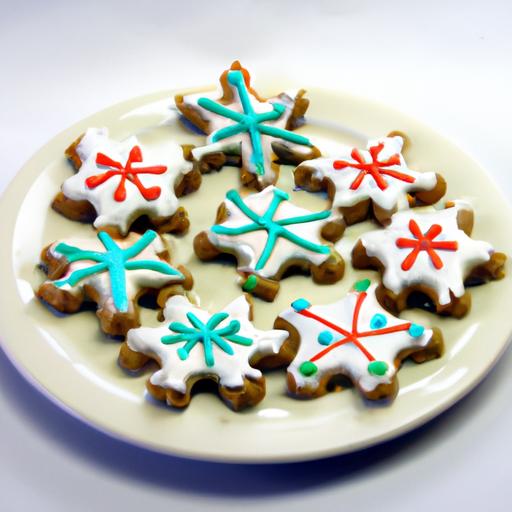
present your gingerbread snowflakes on a white platter dusted with powdered sugar for a snowy effect. Nestle them among fresh pine sprigs or cinnamon sticks to echo festive aromas. These cookies also make stunning edible ornaments-tie a thin ribbon through a small hole before baking or gently glue a ribbon on the back after decorating.
Pair your treats with a cup of spiced tea, mulled wine, or creamy hot chocolate for a cozy winter indulgence. For special gatherings,include a small bowl of glittering sugar crystals or edible silver pearls for guests to add their own sparkle.
| Nutrient | Per Cookie |
|---|---|
| Calories | 130 |
| Protein | 1.5g |
| Carbohydrates | 20g |
| Fat | 5g |

Discover more on mastering seasonal cookie decorating in our Ultimate Guide to festive Icing Techniques. For scientific insights about royal icing chemistry, explore the article by The Curious Chef.
Q&A
Q&A: Crafting Gingerbread Snowflakes with Perfect Royal Icing
Q1: What makes gingerbread snowflakes such a special holiday treat?
A: Gingerbread snowflakes capture the magic of winter with their intricate, frosty designs. Unlike traditional round cookies, their delicate, lacy shapes bring a whimsical, snowy charm to your holiday table or decorations, evoking the serene beauty of freshly fallen snow.Q2: Why is royal icing the go-to choice for decorating gingerbread snowflakes?
A: Royal icing dries hard and smooth, making it perfect for creating the crisp, detailed lines that snowflakes demand. Its sturdy finish lets your gingerbread masterpieces stack, hang, or hold up as edible ornaments without smudging or losing shape.
Q3: What’s the secret to making royal icing that holds its shape beautifully?
A: Achieving royal icing perfection is all about balance: use the right ratio of powdered sugar to egg whites or meringue powder, and beat it until stiff peaks form. If the icing is too soft,your snowflakes will bleed; too stiff,and the piping becomes tough. Aim for a toothpaste-like consistency for outlining, thinning slightly for flooding.
Q4: How can I pipe intricate snowflake patterns without frustration?
A: Patience and the right tools are key. Use a fine-tipped piping bag nozzle and steady your hand by resting your elbow on the table.Start with simple geometric shapes-lines, dots, and branches-and build complexity gradually. Practice on parchment paper to gain confidence before decorating your gingerbread snowflakes.
Q5: Can I add color or shimmer to my royal icing snowflakes?
A: Absolutely! A tiny drop of food coloring dyes your icing without changing the consistency, allowing for soft winter blues, silvers, or classic whites. For extra sparkle, lightly dust your finished cookies with edible glitter or pearl dust once the icing is dry-like frost glinting in the morning sun.
Q6: What tips ensure that my gingerbread snowflakes bake evenly and hold their shape?
A: use a sturdy yet pliable dough,chilled before rolling out to prevent spreading. Roll evenly to about ¼ inch thickness and use sharp cookie cutters for clean edges. Bake at a moderate temperature to avoid browning too much; thicker dough or uneven heat can lead to cracked or misshapen cookies.
Q7: How long does royal icing take to dry,and how shoudl I store decorated gingerbread snowflakes?
A: Royal icing typically dries to the touch within 1-2 hours but reaches firm hardness after 6-8 hours. Store fully dried cookies in an airtight container at room temperature, separated by parchment to keep your delicate snowflakes intact and fresh for up to two weeks.
Q8: Any creative ideas for showcasing gingerbread snowflakes besides eating them?
A: Yes! Decorated gingerbread snowflakes double as gorgeous holiday ornaments-simply punch a small hole before baking and thread a ribbon through once dry. They also make heartfelt gift tags or festive garlands when strung together. Their beauty brightens any chilly winter day, edible art with a cozy spirit.
Embrace the joy of crafting frosty gingerbread snowflakes, turning simple spices and royal icing into a winter wonderland on your holiday platter. With delicate technique and a pinch of creativity, your kitchen becomes a snow-filled workshop where treats enchant and inspire.
The Way Forward
As the final strokes of royal icing settle into delicate, crystalline patterns, your gingerbread snowflakes emerge-each one a tiny masterpiece of winter wonder. Crafting these edible works of art not only fills your kitchen with the warm, spicy scent of ginger and cinnamon but also invites a touch of mindful creativity into the holiday season. With every carefully piped line and dot, you transform simple ingredients into sparkling symbols of frost and festivity. So next time you reach for that piping bag, remember: perfect royal icing is your secret weapon to turning humble gingerbread into dazzling snowflakes that capture the magic of winter, one sweet swirl at a time.