
there’s something undeniably magical about the perfect ice cream sandwich-the way creamy, dreamy ice cream melts between two soft, chewy cookies, creating a harmonious bite of pure bliss. But why settle for store-bought when you can elevate this classic treat with homemade cookies baked to golden perfection? In this article, we’ll dive into the art of crafting irresistible ice cream sandwich bars, combining the rich, buttery goodness of freshly baked cookies with your favourite luscious ice cream flavors. Whether you’re chasing nostalgia or craving a refreshing summer snack, these bars promise a tasty twist that’s as fun to make as it is to devour. Get ready to transform your dessert game with a homemade touch that’s anything but ordinary!
Irresistible Ice Cream Sandwich Bars with Homemade Cookies
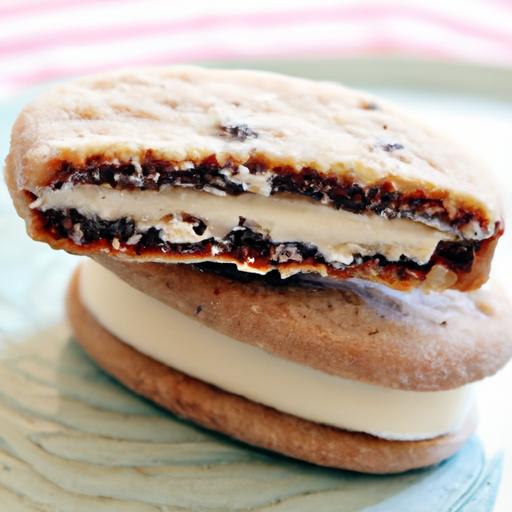
Crafting the perfect cookie base is the secret to achieving those Irresistible Ice Cream Sandwich bars with Homemade Cookies that everyone will rave about.the balance between a tender crumb adn slight chewiness creates a base that not only holds up under creamy ice cream but also delivers an unforgettable texture and flavor experience. From buttery notes to a hint of vanilla and a whisper of salt, the cookie base sets the stage for the ultimate indulgence.
Prep and Cook Time
- Prep Time: 20 minutes
- Cook Time: 12 minutes
- Freezing Time: 4 hours (minimum)
Yield
8 large ice cream sandwich bars (serving size: 1 bar)
Difficulty Level
Medium – Perfect for bakers pleasant with both cookies and no-churn ice cream assembly.
Ingredients
- 1 cup unsalted butter, softened
- 1 cup light brown sugar, packed
- ½ cup granulated sugar
- 2 large eggs, room temperature
- 2 tsp pure vanilla extract
- 2 ½ cups all-purpose flour, sifted
- 1 tsp baking soda
- ¾ tsp kosher salt
- 1 cup semi-sweet chocolate chips (optional)
- 1½ quarts premium ice cream (see flavor suggestions below)
Instructions
- Preheat your oven to 350°F (175°C). Line two 9×13-inch baking pans with parchment paper or silicone mats for easy release.
- Cream the butter and sugars together in a large bowl using an electric mixer until light and fluffy,about 3-4 minutes. This aerates the dough for a tender crumb.
- Add the eggs one at a time, mixing well after each addition. Stir in the vanilla extract until fully combined.
- In a separate bowl, whisk the sifted all-purpose flour, baking soda, and kosher salt. Gradually add the dry ingredients to the wet mixture, stirring on low speed or folding gently with a spatula to avoid overmixing.
- Fold in the chocolate chips, if using, to evenly distribute them throughout the dough.
- Press half of the dough evenly into each prepared pan, smoothing the surface with a spatula. Aim for an even thickness around ½ inch to ensure uniform baking.
- Bake for 10-12 minutes or until the edges are golden and the centers appear set but still soft. Avoid overbaking to retain that chewy texture.
- Remove from oven and allow to cool completely in the pans on wire racks.
- Once cookies are cool, soften the ice cream slightly by letting it sit at room temperature for 5 minutes. Spoon the ice cream evenly atop one cookie layer,spreading gently to the edges with an offset spatula.
- Top with the second cookie base, pressing gently for adhesion but not so firmly as to deform the bars.
- Wrap the entire pan tightly with plastic wrap and freeze for at least 4 hours or until the ice cream is fully firmed.
- Cut into bars using a warm, sharp knife dipped in hot water for clean edges. Serve instantly or keep frozen until ready to enjoy.
Choosing the Ideal Ice Cream Flavor to Complement Your Homemade Cookies
The rich, buttery cookie base pairs beautifully with classic layers of creamy ice cream. For a timeless experience, opt for vanilla bean or salted caramel to enhance the caramelized undertones in the cookie. If you love contrast, mint chocolate chip adds a refreshing coolness that balances the sweetness. For a bold twist, espresso or mocha ice cream intensifies the chocolate chips and deep buttery notes. Remember, the ice cream flavor should complement but never overpower the delicate cookie taste.
Tips for Assembling and Freezing Ice Cream Sandwich Bars Like a Pro
- Use a rimmed pan for precise layering and easy cutting.
- Scoop softened ice cream with a slightly warm spoon or spatula for smooth spreading, preventing cookie breakage.
- Press gently when layering to avoid squeezing out the ice cream but enough for a sturdy sandwich.
- Cover tightly with plastic wrap or foil to avoid freezer burn and absorb any external odors.
- Freeze at least 4 hours, but preferably overnight, for a firm set that slices effortlessly.
Creative Twists and Toppings to Elevate Your Ice Cream Sandwich Experience
Take your treats beyond the classic bars with creative add-ons. Roll the edges in mini chocolate chips, crushed toasted nuts, or rainbow sprinkles for a festive touch. A drizzle of rich chocolate ganache or a light sprinkling of flaky sea salt can transform flavors elegantly. For a decadent crunch, layer thin slices of fresh fruit like strawberries or ripe bananas between the ice cream and cookie. These surprises delight the palate and show off your culinary creativity.
Chef’s Notes
- Make Ahead: Cookies can be baked and stored airtight for up to 3 days before assembling.
- Gluten-free Option: Substitute all-purpose flour with a 1:1 gluten-free baking blend.
- substitutions: Use coconut oil for butter to add subtle tropical depth but reduce baking time slightly.
- Common Issue: If cookies spread too thin,chill dough for 30 minutes before pressing into pans.
- cutting Tips: Use a serrated knife for easier slicing without crumbling.
Serving Suggestions
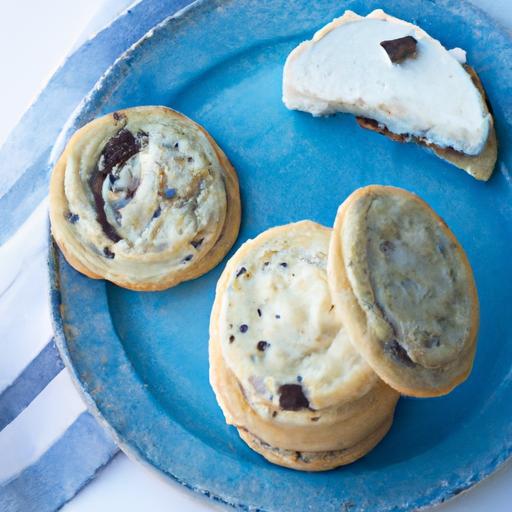
Serve chilled on rustic wooden boards or delicate dessert plates to highlight their homemade charm. Garnish with fresh mint sprigs or edible flowers for visual elegance. Pair with a cup of rich espresso or a tall glass of cold milk for the ultimate nostalgic indulgence. These bars are perfect for summer parties, family picnics, or a luxurious self-care treat-enjoy each bite of Irresistible Ice Cream Sandwich Bars with Homemade Cookies that promise pure bliss.

| Nutrient | Per Serving |
|---|---|
| calories | 350 kcal |
| Protein | 5 g |
| Carbohydrates | 40 g |
| Fat | 18 g |
Explore more homemade frozen treats in our homemade ice cream recipes collection for delicious inspiration.
For detailed food safety guidelines on freezing desserts, visit the USDA Food Safety and Inspection Service.
Q&A
Q&A: Irresistible Ice Cream Sandwich Bars with Homemade Cookies
Q1: What makes these ice cream sandwich bars so irresistible?
A1: It’s all about the perfect harmony of textures and flavors! The homemade cookies provide a warm, buttery, slightly chewy base with just the right amount of sweetness, while the creamy, cold ice cream filling adds a luscious contrast.When combined, each bite delivers a nostalgic, decadent experience that’s hard to resist.
Q2: Why should I make the cookie dough from scratch rather of using store-bought cookies?
A2: Homemade cookies let you tailor the flavor and texture exactly to your liking. You can control the sugar content, add mix-ins like chocolate chips or nuts, and bake them to achieve that ideal softness or crispness.Plus, fresh-baked cookies bring an inviting aroma and warmth that store-bought versions just can’t match.Q3: Can I use any ice cream flavor for these sandwich bars?
A3: Absolutely! This dessert is incredibly versatile. Classic vanilla or chocolate pairs beautifully with chocolate chip or oatmeal cookies, while adventurous combos like salted caramel with brown butter cookies, or strawberry ice cream with almond cookies, can elevate your creation to gourmet status.
Q4: What’s the best way to assemble the ice cream sandwich bars?
A4: First, bake your homemade cookies and let them cool completely. Spread a generous layer of softened ice cream over one cookie, then top with another cookie, pressing gently but firmly. For easy slicing and serving, freeze the assembled sandwiches until firm, then cut into bars with a sharp knife.
Q5: How long can I store these ice cream sandwich bars without losing quality?
A5: When properly wrapped in plastic wrap or stored in an airtight container in the freezer, these bars can keep their deliciousness for up to two weeks.Just be sure to let them thaw for a few minutes at room temperature before indulging to enjoy that perfect bite.
Q6: Any tips for customizing these bars to suit dietary needs?
A6: Definitely! You can use gluten-free flour blends for the cookies, dairy-free or vegan ice cream alternatives, and substitute eggs in the dough with flax or chia seeds. With a few tweaks, everyone can enjoy these irresistible treats.
Q7: What occasion is perfect for serving these ice cream sandwich bars?
A7: These bars are crowd-pleasers for summer parties, birthday celebrations, or even as a charming homemade gift. Their portable,hand-held nature makes them ideal for picnics,potlucks,or just a sweet reward after a long day.
With a little baking love and creativity, these Irresistible ice Cream Sandwich Bars with Homemade Cookies turn simple ingredients into a sensational dessert that’s as fun to make as it is to eat!
Final Thoughts
Whether you’re craving a nostalgic treat or looking to impress at your next gathering, these irresistible ice cream sandwich bars made with homemade cookies bring the best of both worlds to your plate. The crisp, buttery cookies perfectly cradle the creamy, dreamy ice cream, creating a harmony of textures and flavors that’s simply unforgettable. Once you master this recipe,you’ll find endless ways to customize it-swap in your favorite cookie flavors,experiment with diffrent ice cream varieties,or add a drizzle of chocolate or caramel for that extra touch of indulgence. So go ahead, roll up your sleeves, and dive into the blissful art of crafting these delightful bars; your taste buds will thank you for every cool, crunchy, and creamy bite!